> ## Documentation Index
> Fetch the complete documentation index at: https://perfgrid.com/docs/llms.txt
> Use this file to discover all available pages before exploring further.
# SSH keys
> Add ssh-ed25519 or ssh-rsa keys for the main account user in hosting-panel.net.
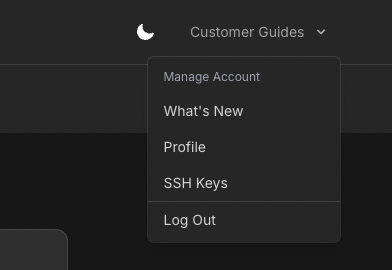
**SSH keys** let the main account user sign in over SSH without a password. Manage them from the user menu: **SSH Keys**. This is not in the Profile settings sidebar.
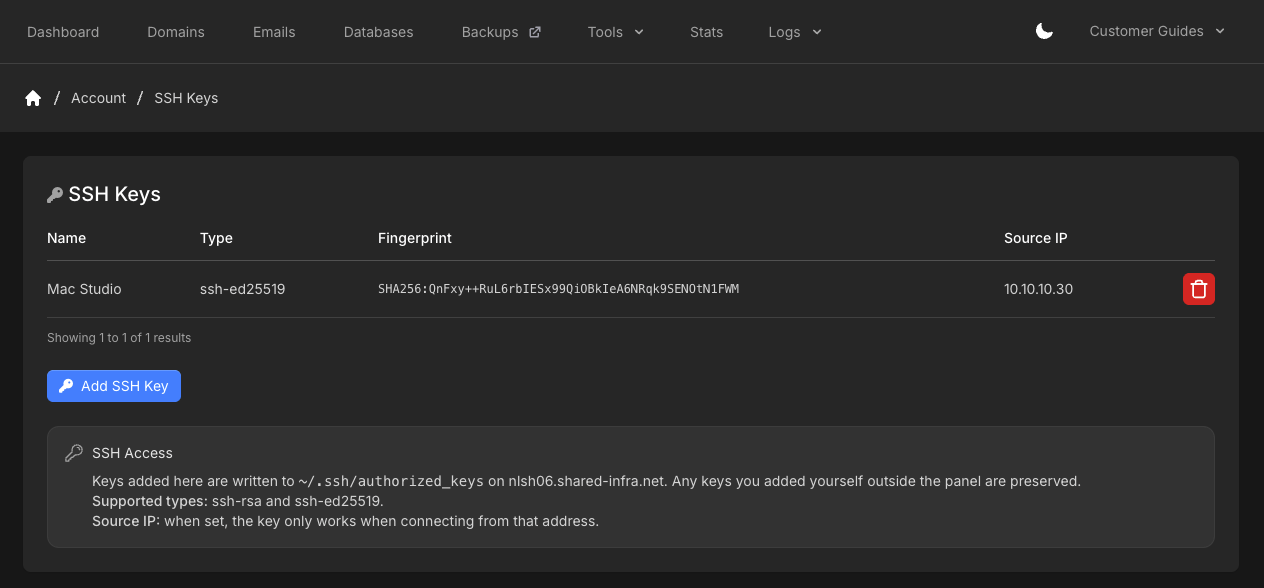
The panel accepts `ssh-ed25519` and `ssh-rsa` public keys. Keys added here are written to `~/.ssh/authorized_keys` on your server. Keys you added yourself outside the panel are preserved.
Grid Hosting SSH listens on port **831**. The **SSH Access** box on this page shows your hostname. See [How do I connect over SSH on Grid Hosting?](/docs/grid-hosting/general/how-do-i-connect-over-ssh).
## Add a key
Generate a key locally if you do not already have one. `ed25519` is a good default:
```bash theme={null}
ssh-keygen -t ed25519
```
For RSA:
```bash theme={null}
ssh-keygen -t rsa
```
Copy the **public** key (`*.pub`). It should start with `ssh-ed25519` or `ssh-rsa`. Never paste the private key into the panel.
Log in at [hosting-panel.net](https://hosting-panel.net). Open the user menu (your account name) and click **SSH Keys**.
 Each row shows **Name**, **Type**, **Fingerprint**, and **Source IP**.
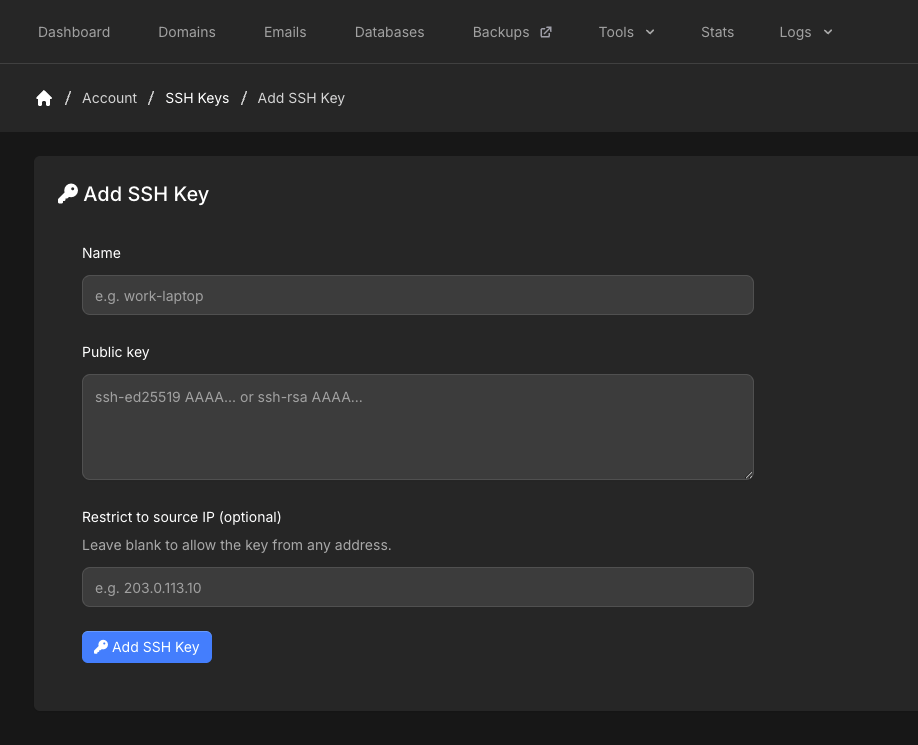
 Click **Add SSH Key**. Enter a **Name** (for example `work-laptop`), paste the **Public key**, and optionally set **Restrict to source IP (optional)** to a single IP. Leave the IP blank to allow the key from any address.
 SSH as the main account user (under **Account Information** on the dashboard, for example `c1234567`) on port **831**:
```bash theme={null}
ssh -p831 -l c1234567 nlsh0X.shared-infra.net
```
Replace the username and hostname with the values shown in the panel.
When a source IP is set, the key only works when connecting from that address.
## Remove a key
Open **SSH Keys** from the user menu and click the delete control on the row you no longer use.
Extra site users should use [FTP accounts](/docs/grid-hosting/tools/ftp-accounts) or [File Manager](/docs/grid-hosting/tools/file-manager). SSH keys apply to the main account user.
## Related articles
* [How do I connect over SSH on Grid Hosting?](/docs/grid-hosting/general/how-do-i-connect-over-ssh)
* [FTP accounts](/docs/grid-hosting/tools/ftp-accounts)
* [File Manager](/docs/grid-hosting/tools/file-manager)
* [Profile settings](/docs/grid-hosting/profile/profile-settings)
SSH as the main account user (under **Account Information** on the dashboard, for example `c1234567`) on port **831**:
```bash theme={null}
ssh -p831 -l c1234567 nlsh0X.shared-infra.net
```
Replace the username and hostname with the values shown in the panel.
When a source IP is set, the key only works when connecting from that address.
## Remove a key
Open **SSH Keys** from the user menu and click the delete control on the row you no longer use.
Extra site users should use [FTP accounts](/docs/grid-hosting/tools/ftp-accounts) or [File Manager](/docs/grid-hosting/tools/file-manager). SSH keys apply to the main account user.
## Related articles
* [How do I connect over SSH on Grid Hosting?](/docs/grid-hosting/general/how-do-i-connect-over-ssh)
* [FTP accounts](/docs/grid-hosting/tools/ftp-accounts)
* [File Manager](/docs/grid-hosting/tools/file-manager)
* [Profile settings](/docs/grid-hosting/profile/profile-settings)