> ## Documentation Index
> Fetch the complete documentation index at: https://perfgrid.com/docs/llms.txt
> Use this file to discover all available pages before exploring further.
# Patchstack
> Buy the Patchstack add-on, assign a license to a WordPress domain, and review vulnerabilities with virtual patching.
**Patchstack** is a paid add-on for WordPress on Grid Hosting. It needs a **license**. The panel shows an overview of plugins and themes, and we **apply virtual patching** (vPatch) for known issues.
Open it from **Tools** → **Patchstack**, or from [WordPress Site Overview](/docs/grid-hosting/wordpress/wordpress-site-overview) (**Get Patchstack** / **Protect with Patchstack**).
## Buy a license
Log in at [hosting-panel.net](https://hosting-panel.net) and go to **Tools** → **Patchstack**.
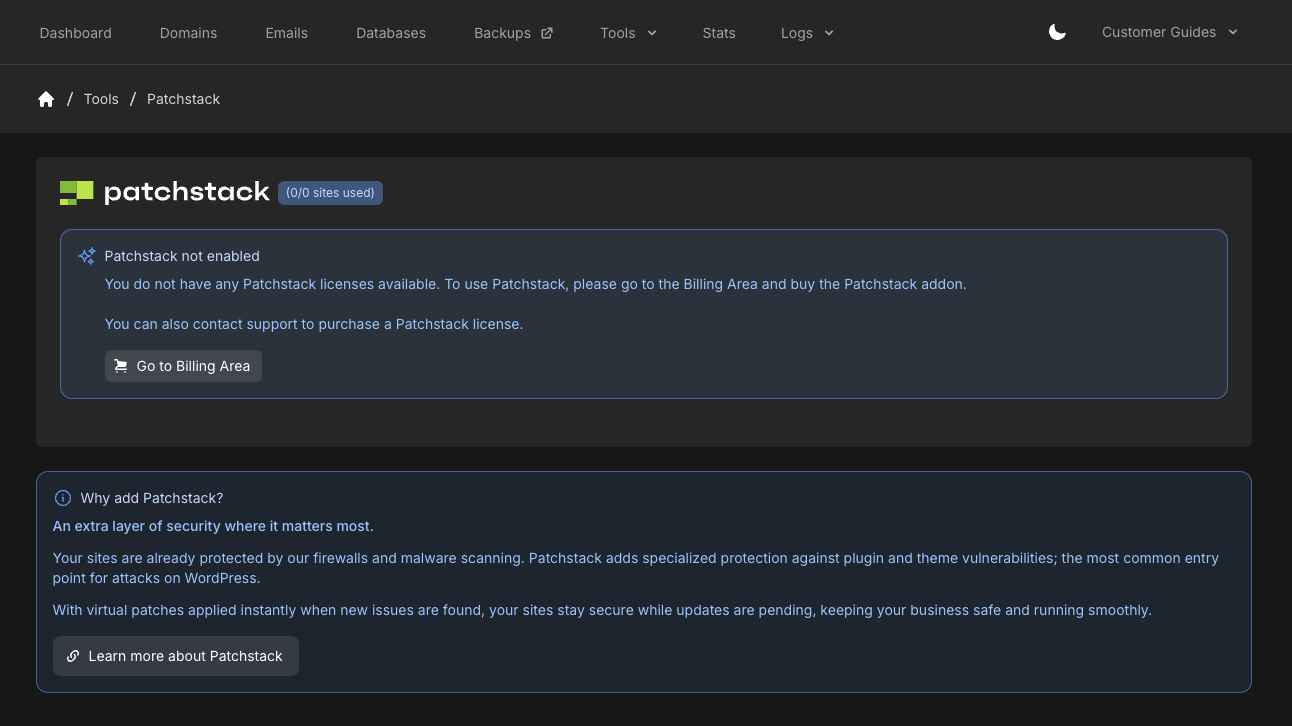
If you have no licenses, the page shows **Patchstack not enabled** and **(0/0 sites used)**. Click **Go to Billing Area** to buy the Patchstack add-on. You can also contact support. That purchase assigns **one license** to your account.
 Virtual patches apply when new issues are found, so the site can stay protected while you wait to update plugins.
## Assign the license to a domain
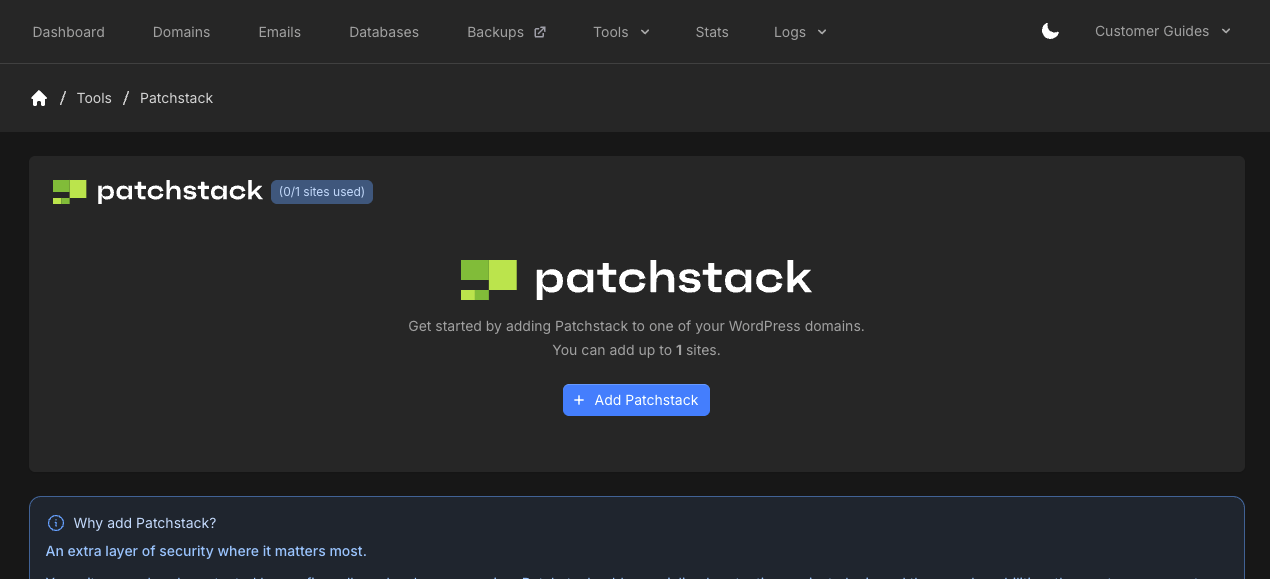
After purchase, Patchstack shows **(0/1 sites used)** and **Add Patchstack**. You can add up to the number of sites your licenses allow.
Virtual patches apply when new issues are found, so the site can stay protected while you wait to update plugins.
## Assign the license to a domain
After purchase, Patchstack shows **(0/1 sites used)** and **Add Patchstack**. You can add up to the number of sites your licenses allow.
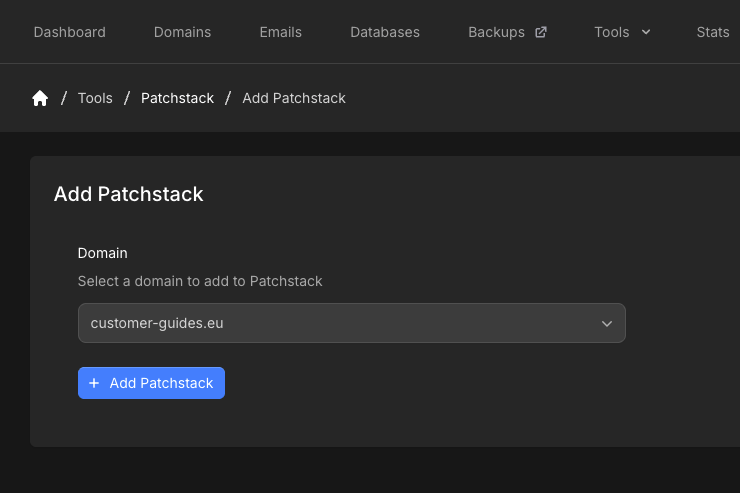
 Click **Add Patchstack**, choose the WordPress **Domain**, then click **Add Patchstack** again. The panel tries to install the Patchstack plugin and activate the license automatically.
 ## Site overview
Open the site from Patchstack to see **Site Overview**.
## Site overview
Open the site from Patchstack to see **Site Overview**.
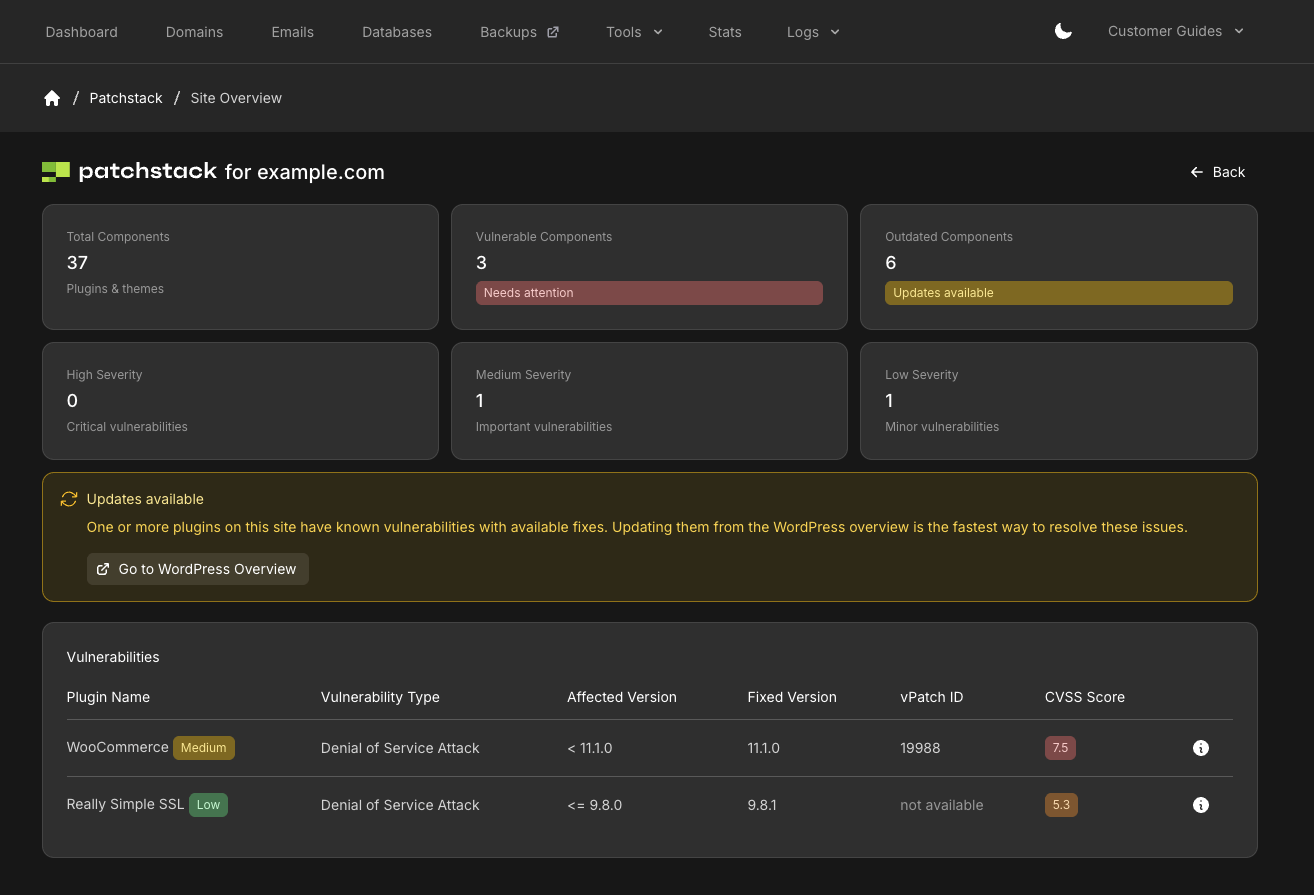 The cards show:
* **Total Components** (plugins and themes)
* **Vulnerable Components**
* **Outdated Components**
* **High Severity**, **Medium Severity**, and **Low Severity**
If updates are available, **Updates available** includes **Go to WordPress Overview** so you can update plugins from [Site Overview](/docs/grid-hosting/wordpress/wordpress-site-overview).
The **Vulnerabilities** table lists:
* Plugin name (with severity)
* Vulnerability type
* Affected version
* Fixed version
* vPatch ID
* CVSS score
Use the information icon on a row to open the Patchstack article for that vulnerability.
WordPress Overview also shows known vulnerabilities on its own. Use Patchstack when you have the add-on and want this dashboard plus virtual patching.
## Related articles
* [WordPress Site Overview](/docs/grid-hosting/wordpress/wordpress-site-overview)
* [Default WordPress SMTP configuration](/docs/grid-hosting/wordpress/default-wordpress-smtp-config)
The cards show:
* **Total Components** (plugins and themes)
* **Vulnerable Components**
* **Outdated Components**
* **High Severity**, **Medium Severity**, and **Low Severity**
If updates are available, **Updates available** includes **Go to WordPress Overview** so you can update plugins from [Site Overview](/docs/grid-hosting/wordpress/wordpress-site-overview).
The **Vulnerabilities** table lists:
* Plugin name (with severity)
* Vulnerability type
* Affected version
* Fixed version
* vPatch ID
* CVSS score
Use the information icon on a row to open the Patchstack article for that vulnerability.
WordPress Overview also shows known vulnerabilities on its own. Use Patchstack when you have the add-on and want this dashboard plus virtual patching.
## Related articles
* [WordPress Site Overview](/docs/grid-hosting/wordpress/wordpress-site-overview)
* [Default WordPress SMTP configuration](/docs/grid-hosting/wordpress/default-wordpress-smtp-config)