

NS on a subdomain) and Static Routing (CNAME).
This guide uses Dynamic Routing, which is the method Klaviyo recommends.
Have the records from your Klaviyo dashboard ready before you start.
1
Log in
Log in to your hosting panel at hosting-panel.net.
2
Go to Domains
Click Domains in the top menu.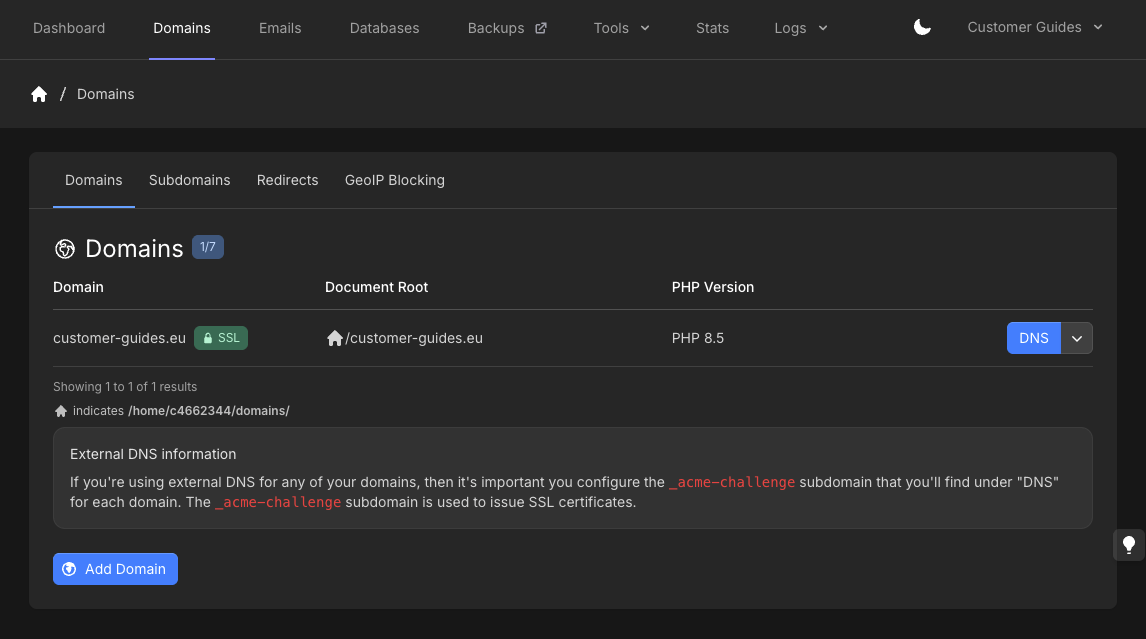
3
Open the DNS editor
Click DNS for the domain you want to update.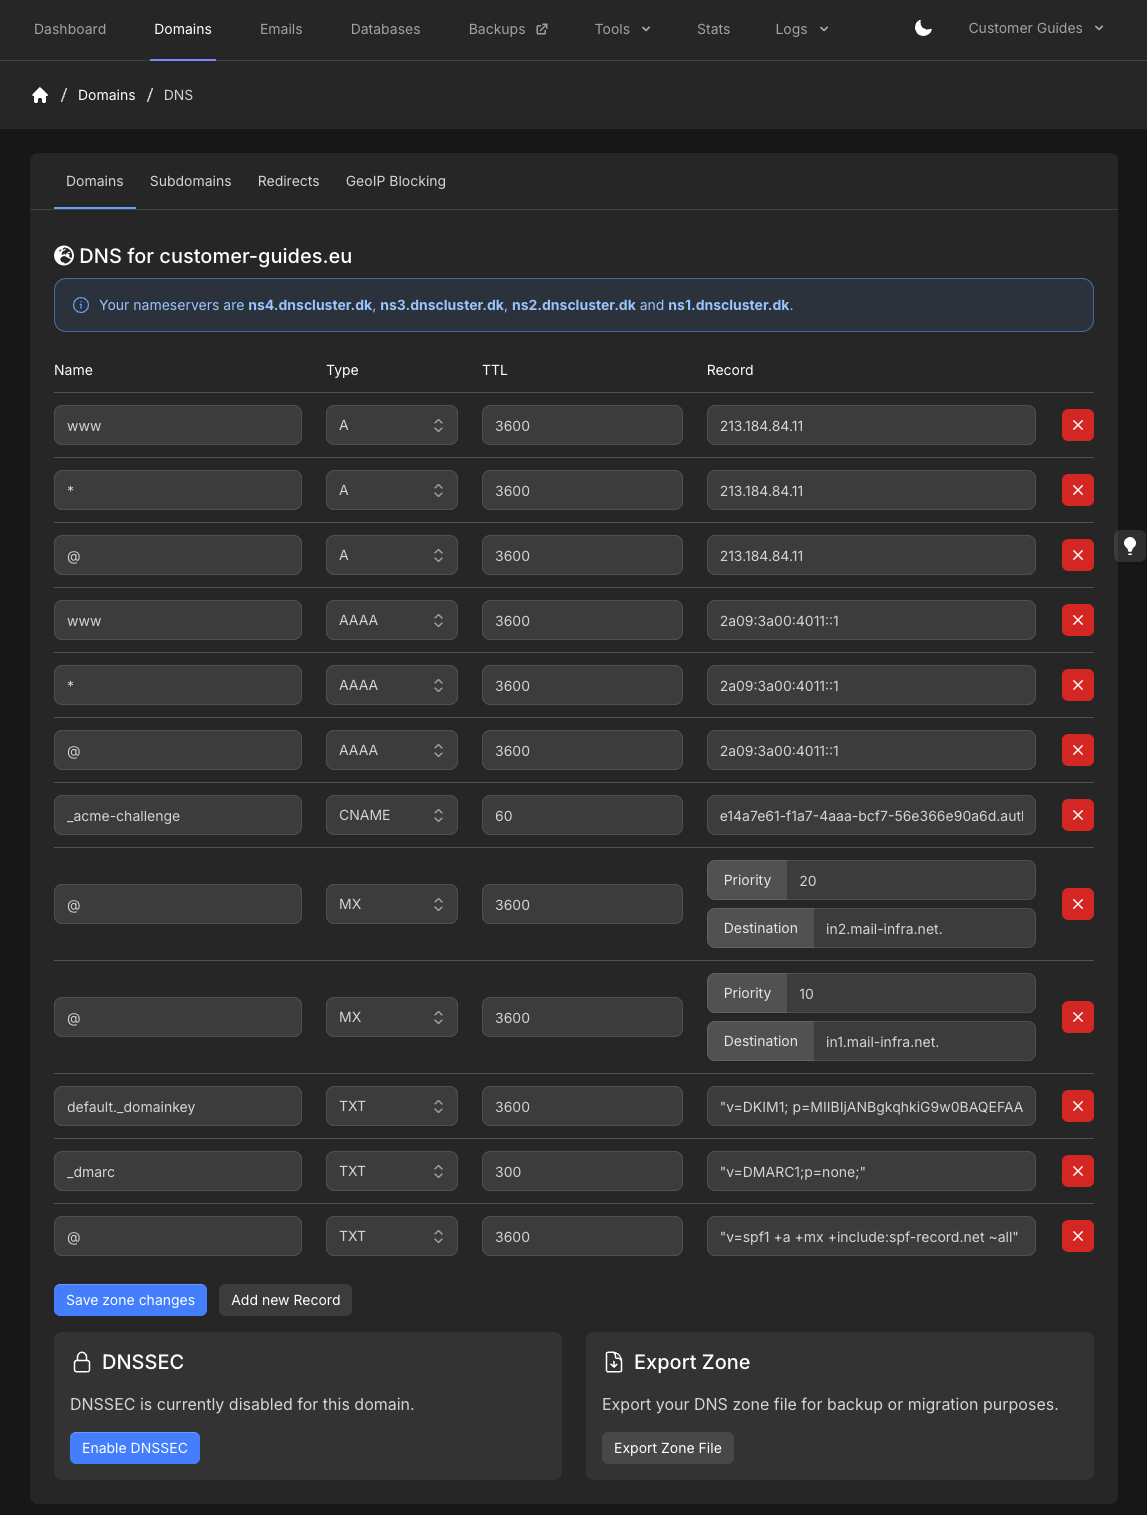
4
Add the NS records
Click Add new Record and add four NS records. This example uses 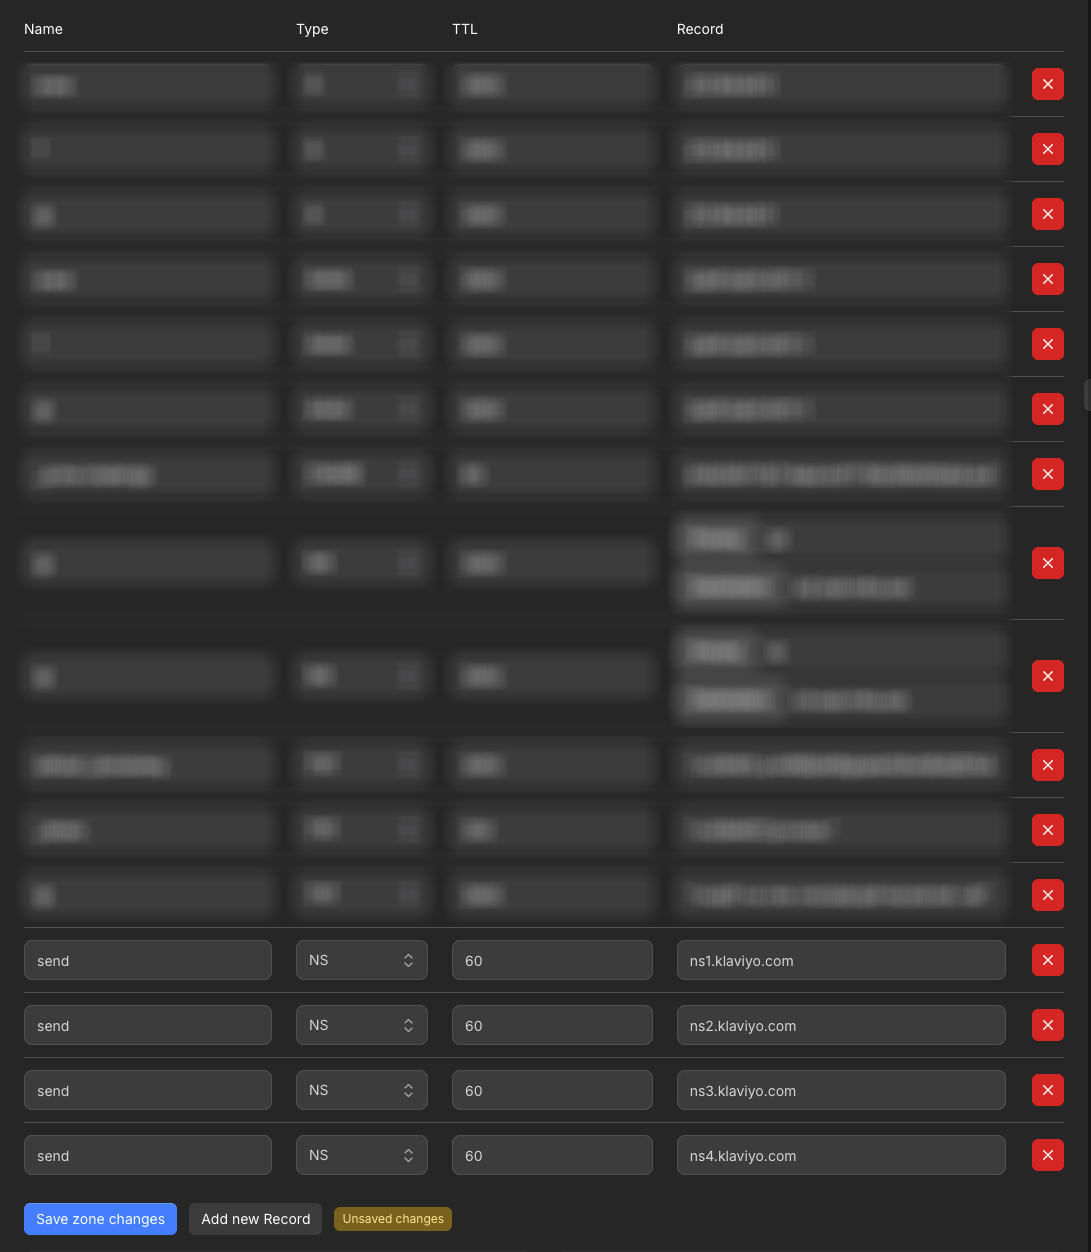
send as the subdomain.Set Name to send, Type to NS, and Record to ns1.klaviyo.com through ns4.klaviyo.com.Record names are relative to your domain. Use
send, not send.example.com. If a banner suggests a shorter name, click Fix it.5
Add the TXT record
Click Add new Record again. Set Type to TXT, Name to 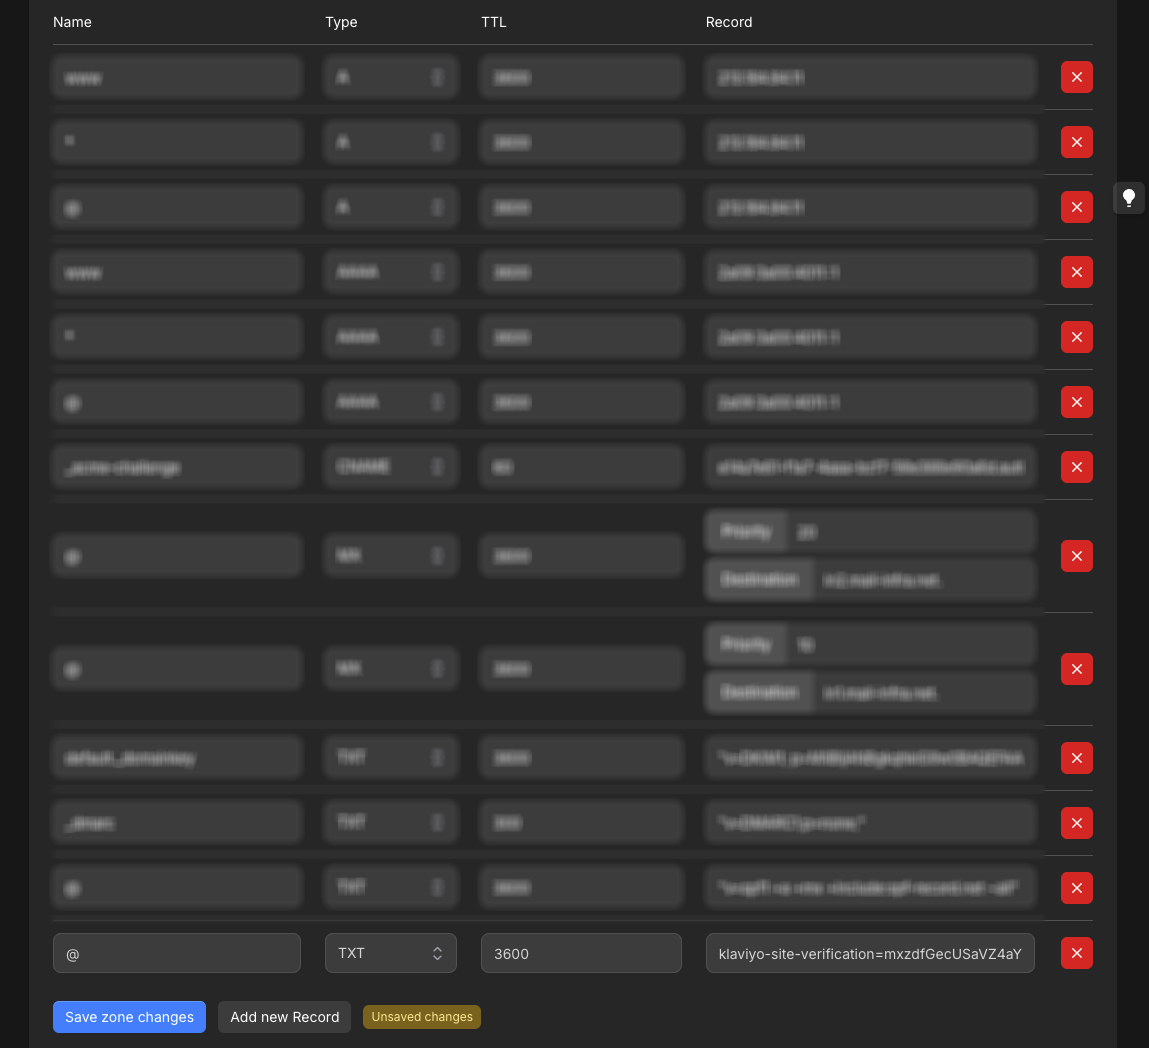
@, and paste the verification string into Record.klaviyo-site-verification=mxzdfGecUSaVZ4aY is an example. Copy the real verification string from your Klaviyo dashboard.6
Save
Click Save zone changes. The Unsaved changes badge disappears when the zone is saved.